
Making your own DIY acoustic treatment for your home studio can seem hard. But, it’s a smart way to save money. This guide shows you how to make your own acoustic panels and bass traps.
Let’s get started!

Understanding Acoustic Treatment Basics
Acoustic treatment can significantly impact the sound quality in your home studio. Panels, bass traps, and diffusers are key components that help control reflections and standing waves within a room.
Understanding these basics can make a huge difference in how your recordings sound.
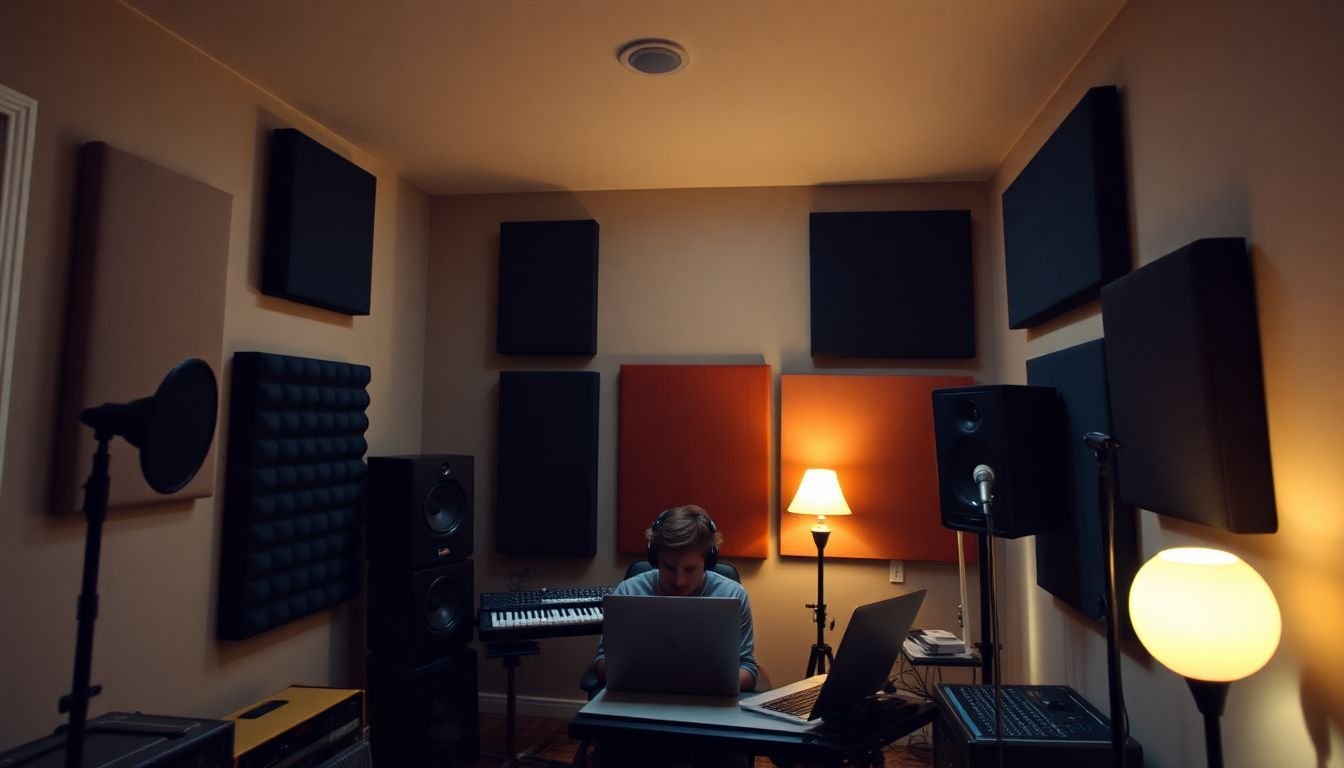
Importance of Acoustics in Home Studios
Good acoustics are key for making music in home studios. They let you hear what’s truly going on with your mixes. Without proper acoustic treatment, your room might trick you into making bad mixing choices.
This is because untreated rooms have issues like comb filtering and flutter echo. These problems mess with how sound waves bounce around the room.
To fix these issues, use bass traps and acoustic panels in your studio space. Bass traps help control low sounds that often get stuck in corners. Acoustic panels take care of higher sound frequencies by catching echoes off walls and ceilings.
Together, they improve sound quality so your recordings turn out great no matter where they’re played back.
Key Components: Panels, Bass Traps, Diffusers
Acoustic treatment makes your home studio sound better. It uses three main things: panels, bass traps, and diffusers. Panels take in mid and high sounds. Use them after setting up bass traps, which catch low sounds.
This is important in small rooms where these low sounds can mess up your music. For the panels, people often use mineral wool or foam inside a wooden frame.
Diffusers are the third key thing. They spread out sound so it doesn’t bounce back at you from walls and floors. This keeps the room’s natural sound but doesn’t work as well in tight spaces.
Together, these components improve how music sounds by handling different types of sound waves.
Combining absorption with diffusion helps achieve clear and balanced acoustics in your studio.
Step-by-Step Guide to DIY Acoustic Panels
Create your DIY acoustic panels using simple materials like textile, screws, and insulation. Build the frame, add the fabric and insulation, and enjoy improved sound quality in your home studio.
Check out our budget-friendly tips for alternatives to traditional materials and where to find affordable options!
Choosing Materials
For your DIY acoustic panel, picking the right materials is key. Mineral wool is a popular choice because it’s cheap. Yet, some worry about its health and planet effects. Think about using hemp or wood shaving batts instead.
These are better for you and the Earth.
You’ll also need to cover your panels. Muslin and burlap are good if you’re watching your budget. They let sound pass through easily, which makes them work well for this job. Make sure to choose fabric that does not bounce sound back to keep your studio sounding great.
Use a staple gun to attach the fabric tightly around insulation like mineral wool or hemp inside a wooden frame you’ve built yourself – no drill needed if you pre-drill holes! This simple approach helps control unwanted echo in your home studio without breaking the bank or needing heavy tools like saws or power tools from a hardware store.
Building the Frame
To build the frame for your DIY acoustic panel, start with 20 mm thick plywood. This ensures stability. You’ll need a saw or any power tool to cut the wood accurately. For insulation batts sized 575 mm by 1220 mm, make your frame’s length 1260 mm.
Pre-cut plywood can save you both time and effort.
Before assembling, pre-drill holes in the plywood to avoid splitting. It’s wise to put together multiple frames at once if you’re making several panels. Always wear safety gear while working with tools and materials.
Pre-drilling holes makes assembly smoother and prevents your wood from splitting.
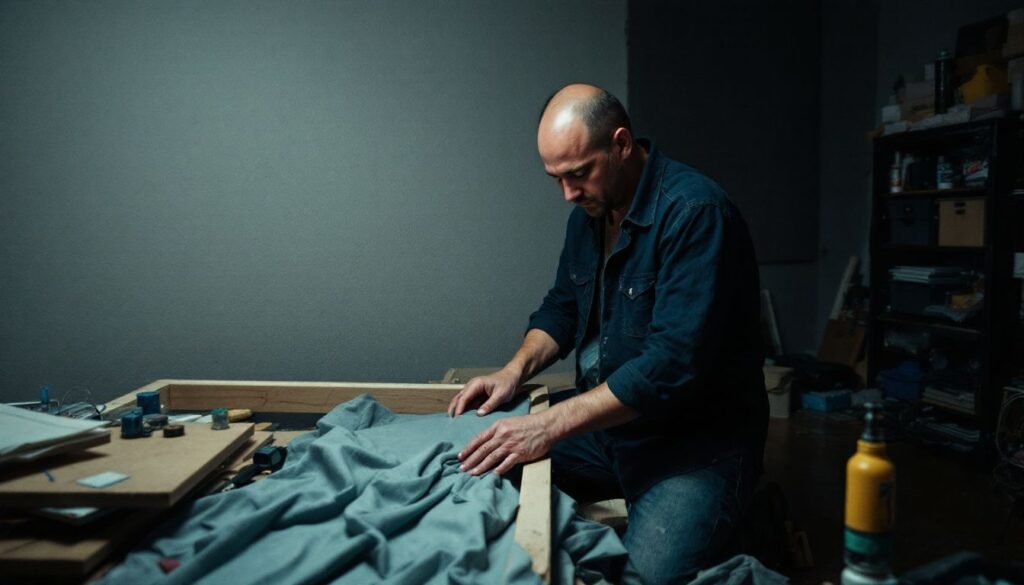
Adding Insulation and Fabric
Place the insulation batts within the structure you constructed. This step holds significant value for sound absorption in your studio. This substance absorbs undesired noise, contributing to superior audio quality.
For the rear of your panel, employ garden fleece and cut it slightly larger than required. This facilitates overlap when you fasten it with staples to the frame. Ensure not to exert too much tension; this can distort the mesh.
Subsequently, enrobe your panel with Akustiktex CS fabric from Molton24.de, or similar materials—slicing surplus so you can fold and staple corners neatly. The incorporation of this fabric enhances the appearance and also assists in absorbing more undesired sound frequencies, creating a more acoustically harmonious studio.
Finally, affix hooks to suspend your panels on walls, but bore holes prior to this both in the panels and the intended wall space. Ensure to take measurements twice so everything aligns perfectly when you secure them.
Budget-Friendly Tips for DIY Acoustic Treatment
Looking to save some cash on your DIY acoustic treatment project? Unleash your creativity by repurposing household items like blankets or foam tiles for soundproofing and absorption.
Find affordable materials at local hardware stores or online sources, ensuring a pocket-friendly approach to enhancing acoustics in your home studio.
Using Household Items as Alternatives
You don’t need to spend a lot on making your home studio sound better. Look around your house for things that can absorb sound. Blankets, curtains, and pillows are great for this. Try hanging blankets over walls or placing them over windows to keep noise out.
This helps make the sound in your room clearer.
Bookshelves filled with books work well as sound diffusers too. They break up the noise so it doesn’t bounce straight back at you. Placing old rugs or carpets on hard floors cuts down on echo and makes your recordings cleaner.
If you have upholstered furniture, move it around until you find the best spot where it improves how your studio sounds.
Also, using moving blankets as barriers can block outside noise from coming in through windows or thin walls. All these items combined will help control reverberation and absorb unwanted frequencies in your studio without breaking the bank.
Where to Find Affordable Materials
Looking for low-cost materials for your DIY acoustic panels is easier than you might think. Start by checking out local hardware shops or online marketplaces. These places often have deals on insulation material and fabric that can work great in absorbing sound.
For wooden frames, ask at construction sites if they have spare wood. Sometimes, they’ll give it away for free or a small price.
Also, explore thrift stores and online ads for used blankets or thick curtains. They make excellent absorbent layers without breaking the bank. Join groups on social media where music producers share tips and sell items they no longer need.
This way, you can find second-hand materials like denim insulation or acoustic foam at a much lower cost than new ones.
Conclusion
In conclusion, mastering the acoustics of your home studio through DIY methods can deliver cost-effective results. Understanding the basics and tools needed to construct acoustic panels is pivotal for achieving optimal sound quality.
Experimenting with different configurations while following the step-by-step guide provided will assist in refining the sound in your workspace. With dedication to details and a goal-oriented approach, you can unlock the full potential of your DIY acoustic treatment and elevate your music production experience.
For more in-depth information on enhancing your studio’s sound, explore our guide on advanced electronic music synthesis techniques.
References
- https://emastered.com/blog/home-studio-acoustic-treatment (2022-05-13)
- https://ehomerecordingstudio.com/acoustic-treatment-101/
- https://www.waves.com/diy-acoustic-treatment-home-studio-step-guide
- https://www.instructables.com/DIY-Acoustic-Panels-1/
- https://www.blackghostaudio.com/blog/how-to-build-your-own-diy-acoustic-panels?srsltid=AfmBOooXw9ymKM0sYUd7R0KEybihU-QZ9Wjl_NFgq7O2kQxXUC9AOrhr (2020-03-16)
- https://www.boomboxpost.com/blog/2016/11/5/diy-acoustic-panels-for-your-home-studio
- https://www.productlondon.com/?p=245531 (2024-11-22)
- https://www.abletonlessons.com/music-production-tips-and-tricks/acoustic-treatment-on-a-budget-a-guide-for-home-studios (2024-06-11)
- https://www.production-expert.com/production-expert-1/diy-sound-treatment-affordable-acoustics-for-your-studio (2024-12-27)


